Excel Concentration Game

A couple of Fridays ago, in the What’s in Your Desk Drawer comments, Doug Glancy mentioned that he had created a concentration game in Excel.

One of my first Excel VBA programming fun projects was to write one for my daughter and I to play. It had multiple decks, 3 user modes and “animated” cards (the pairs moved across the screen to a pile when correctly selected). Somewhat fun to play, and a great learning experience.

Download the Sample File

Doug sent me a copy of the file, so you can see the game for yourself: Excel Concentration Game

When the file opens, you can enable the macros, so the game will run. There’s one worksheet, with a button that you click to start the game.
Start button for Excel concentration game

The Game

The game opens, with a deck of cards, turned face down. You select two cards and try to match the pictures.

Conc02

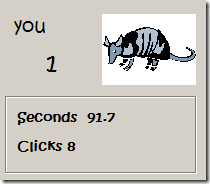
The game records the number of clicks, time used, and the match count. I am very bad at this game!

Conc03

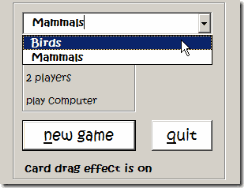
There are game options, including number of players, and type of card.

Conc04

How It Works

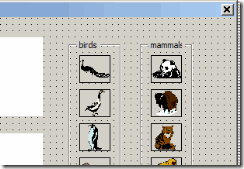
Doug’s concentration game is built on a UserForm. In the sample file you can see all the code that makes it operate. It took me a couple of minutes to find the sets of cards – one for mammals and one for birds. They’re to the right of the visible area on the UserForm.

Conc05

Other Excel Games

Do you know of any other free Excel games out there?
____________________

Excel Back Up For Google Sheets

Excel is always my first choice in spreadsheets! Recently though , I’ve been using Google Spreadsheets, to help plan a family event.

I created a file and shared it with a few people, and it’s a quick and easy way for us to keep track of who’s doing what.

We Need a Backup

Then it dawned on me that we’re storing all this information online, with no backup. What happens if we can’t get to that file, a few days before the event? Too horrible to even think about!

So, I copied everything from the Google Spreadsheet, and pasted it into Excel. Not too efficient, but at least I had an offline copy.

Export a Copy to Excel

After I had created the emergency backup file, I looked around to see what other options there are for making the backups.

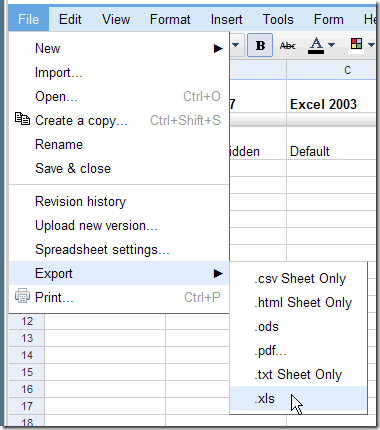
The first thing I found was that I could export to Excel, when I had a Google Spreadsheet open.

Click the File menu, then click Export, and click the .xls option.

GoogleDL03

In the dialog box that appears, to can click the Save option, then name the file and select a folder to store it in.

Save One Selected File as Excel

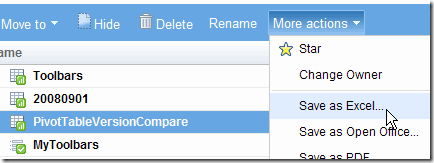
When you’re looking at the list of your Google Documents, you can add a check mark to select one Google Spreadsheet.

Then, click More actions, and click Save as Excel. (If more than one file is selected, the list won’t show the Save options.)

GoogleDL02

Download Selected Files

If you have lots of Google Documents, you might want to download and save more thane one file at a time.

To do this in Firefox, I installed GreaseMonkey, Google Docs Download script, and the DownThemAll add-on. That took a couple of minutes, and went very smoothly.

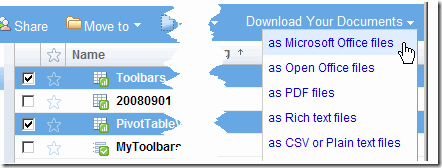
The script add a new menu, Download Your Documents, to the Google Documents menu bar.

Select all the files that you want to download, then click Download Your Documents, and click as Microsoft Office files.

GoogleDL01

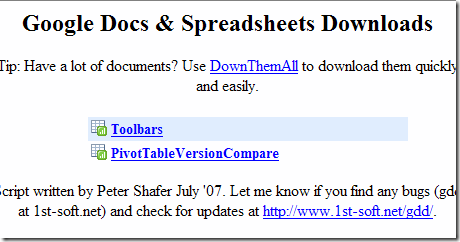
A new web page appears, with a list of your selected files.

GoogleDL04

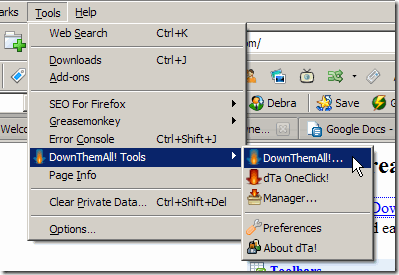
In the Firefox menu bar, click Tools, then click DownThemAll! Tools, and click DownThemAll!…

GoogleDL05

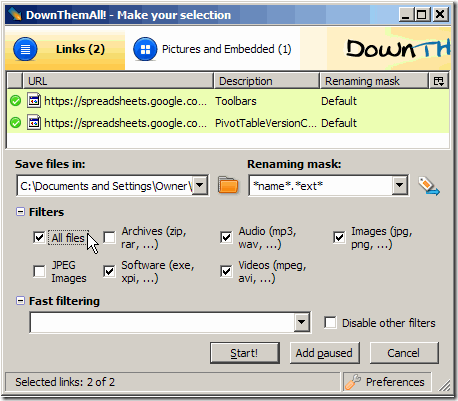
In the DownThemAll dialog box, click All files, or select specific files to download.

Click Start! to start the download.

GoogleDL06

What’s Your Backup Plan?

Do you use Google Documents? If so, how do you create backup files? Maybe you’ve found an easier way to accomplish this.
_______________

Different Excel Drop Downs from One Source

To help users enter data in a spreadsheet, you can create drop down lists with Excel’s Data Validation feature. For example, in an order form, you could provide drop down lists of customers, products, colours, sizes and shipping methods.

Data Validation Source

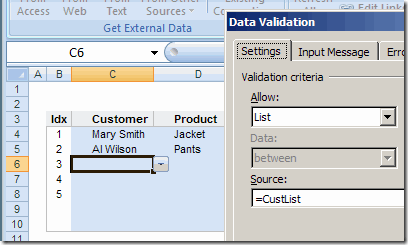
Usually, each of these lists would need a different Source in the Data Validation dialog box.

  • The Customer list would have =CustList as its source
  • The Product drop down would have =ProdList as its source.
Customer list data validation source

Use the Same Source

Instead of using a different source for each data validation list, AlexJ has devised a simple way to use the same source for all the lists. This makes it much easier to create and maintain a set of drop down lists.

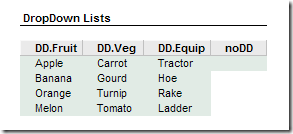
In AlexJ’s sample file, he’s recording farm information, with drop down lists for Fruit, Vegetable, Farm Equipment and Farmer. He’s typed these lists in the workbook, and named them: DD.Fruit, DD.Veg, DD.Equip and noDD.

The noDD list is just a blank cell, and it can be used when you want users to be able to type freeform in a column.

APJ_UnivDD02

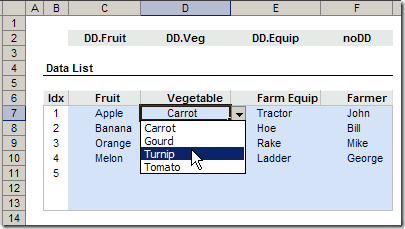
In row 2, above the table where users will select from the drop down lists, AlexJ has typed the name of the source range for the column below.

APJ_UnivDD01

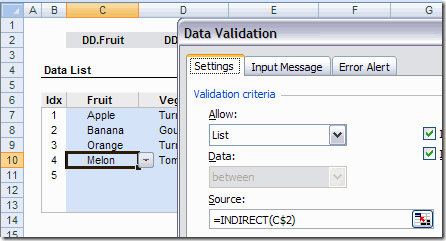
Then, AlexJ selected all the blue cells, where drop down lists will be created. In the Data Validation dialog box, he selected Allow: List. As the Source, he entered: =INDIRECT(C$2)

The column reference (C) is relative, and the row reference ($2) is absolute.

APJ_UnivDD03

Setup Tips

  • AlexJ hides row 2, using Outlining, so users aren’t distracted by the range names.
  • In the sample file, the named ranges are on the same sheet as the data entry range. In his actual files, AlexJ would have these on another sheet, hidden from users.
  • Instead of selecting noDD, cell F2 could be left blank, so no dropdown list would appear.
  • No Error Alerts or Input Messages are used in the sample file, but you could add these to your application, if needed.
  • The drop down range names in cells J6:M6 are in a range named DD.Ranges. That range is used to create the drop down lists in row 2.

Download the Sample File

To download AlexJ’s sample file click here: Universal Data Validation Drop Downs (zipped 25 KB)

What Do You Think?

I frequently use the INDIRECT function to create dependent data validation lists. However, I hadn’t seen this idea used before, to create different drop down lists from the same source formula.

To me, it seems like a great way to create several adjacent lists, and makes it easy to maintain them.

AlexJ would appreciate your feedback. What do you think? Would you use this technique? Anything you’d add or change?
_________________________
Lock Excel Shape To Reuse It Easily

When you’re inserting a shape in Excel 2007 (or using a drawing tool in earlier versions), sometimes you want to use the shape a few times, not just once.

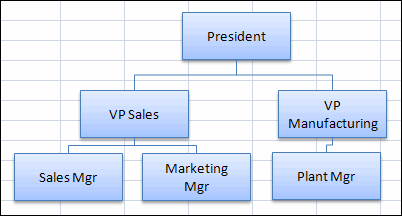
For example, if you’re creating a simple flow chart or organization chart, there might be several rectangles and connector lines.

Simple Flow Chart in Excel

Make Quick Shapes

Yes, I know there are better tools for this kind of thing, but sometimes it’s easier and quicker to do it in Excel or Word.

Instead of going back to the Ribbon, to create each shape, you can select the shape once, and use it several times.

Reuse Shape in Excel 2007

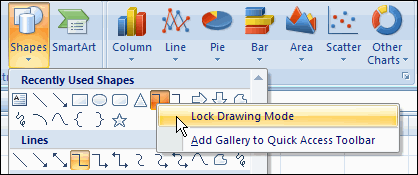
  1. Click on the Ribbon’s Insert tab, and click Shapes.
  2. In the list of shapes, right-click on the shape that you want to use
  3. Click Lock Drawing Mode
Lock Drawing Mode command

Now you can click on the worksheet to add that shape in its default size, or drag on the worksheet to create a shape in a specific size.

Tip: Press the Shift key while you drag, to constrain the shape.

Reuse a Shape in Excel 2003

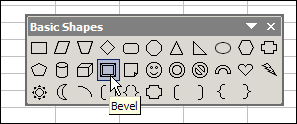
  1. On the Drawing toolbar, double-click the shape that you want to use

If the shape is not in the Drawing toolbar:

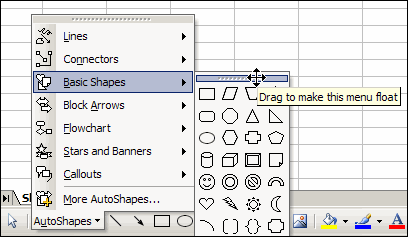
  • On the Drawing toolbar, click AutoShapes
  • Click a category, to view its shapes
  • Point to the bar at the top of the shapes list
  • When the pointer is a 4-headed arrow, drag the shapes palette onto the worksheet.

ShapesDrag2003

  • In the shapes palette, double-click the shape that you want to use

ShapeClick2003

Turn Off the Locked Shape

When you’re finished using the shape:

  • press the Esc key on the keyboard, OR
  • click that shape on the Ribbon’s Format tab (or toolbar in earlier versions), to deselect it.

__________________

Excel Fun – Musical Spreadsheets

Last week I saw a an article by Giles Thomas, who uses a Resolver One spreadsheet to play music.

ResolverPlayer

Play Music in Excel

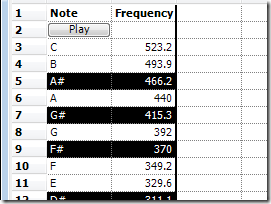
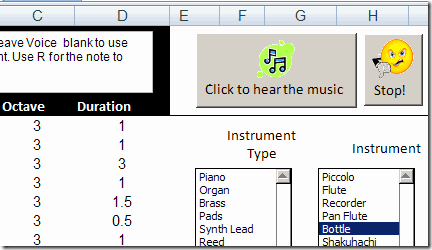
If it can be done in another spreadsheet, Excel must be able to play music too, so I checked with the most likely suspect, John Walkenbach. Sure enough, he created an Excel midi-player that you can download.

NO LONGER AVAILABLE

Play Music in Excel Workbook

Duelling Banjos in Excel

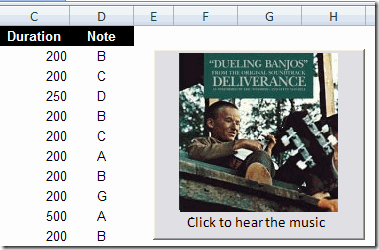
John also has a Duelling Banjos Excel player, that he posted on his blog a couple of years ago.

DuelBanjo

Excel Web Radio

Another way to get music in Excel is with this Excel Web Radio Streaming sample file, created by Harald Staff.

Harald’s web radio Excel workbook is small (47 kb), and easy to use.

To get the Excel file, and start your own music station, go to the Harald Staff Sample Files page in my Contextures site.

excel web radio

Music Playlist Creator

Even if you’re not musically gifted, you can still use Excel to help you enjoy your music collection.

Dave Peterson has created an Excel Music Playlist Creator that you can download.

The code in Dave’s workbook creates a playlist of music from a selected folder, and puts it on your desktop.
_______________________________
Open Related Excel Files-Save Workspace

Do you have a few Excel files that you usually have open all at the same time?

  • Maybe the files are linked, and you update one and check the results in the other file.
  • Or maybe there are a few files that you open first thing every morning, to enter or update the data.

Open and Arrange Files

After you open the files, you might spend a minute or two arranging the files so you can see everything as you work.

Then you make the changes, close everything, and do the same thing again tomorrow.

Save Time With Excel Workspace

To save time, you can use Excel’s Save Workspace feature. It remembers which files are open, how you have them arranged, and where the files are located.

The Workspace file doesn’t contain the files themselves.

You’ll still be able to open the files individually, and use the Workspace file when you want to open them together.

  • [UPDATE: Unfortunately, Excel’s Save Workspace feature is not available in newer versions of Excel]

Prepare the Files

  1. Open all the files that you want to use.
  2. Arrange the files any way you’d like (Tiled, Vertical, etc.)

Create a Workspace File

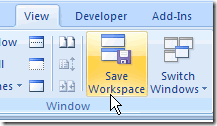
In Excel 2007 / 2010, click Save Workspace, on the Ribbon’s View tab.

Excel 2007 / 2010, click Save Workspace

Excel 2003 Workspace

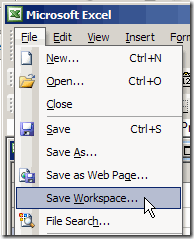
In Excel 2003, click the File menu, then click Save Workspace.

SaveWorkspace

Type a name for the Workspace file, and click OK. The xlw extension will be automatically added to the file name.

Close a Workspace File

In Excel 2003, hold the Shift key, click the File menu, and click Close All.
In Excel 2007, close each file individually, or add the Close All command to the Quick Access Toolbar.

Or, to close all the files, and Excel, hold the Shift key, and click the X at the top right of the Excel window.

Open a Workspace File

Open a Workspace File, just as you would open any other Excel File.

Click the Open button, select the Workspace file, and click Open.
__________________
Show or Hide Excel Data Entry Pop-Up Tips

When you set up a worksheet for other people to use, data validation messages can help them get started. The messages appear, like little ToolTips, when a user clicks on a cell.

Users Show or Hide Messages

After using the Excel workbook for a while, users might not need those messages anymore, and the pop-up messages become annoying, rather than helpful.

AlexJ, who recently shared his technique for hiding rows with Excel outlining, has created another useful sample.

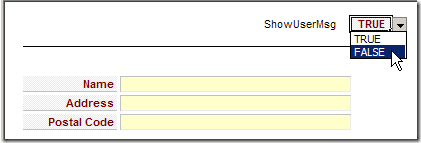
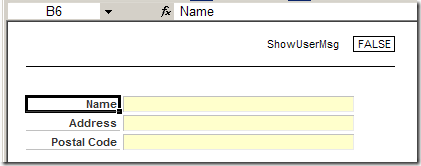
In this file, he lets users turn those data validation messages on or off, by choosing TRUE or FALSE from a drop down list.

turn those data validation messages on or off

Show Messages – TRUE

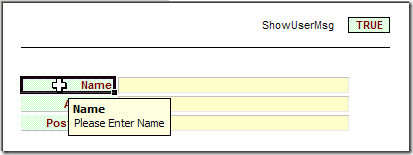
When TRUE is selected, the label cells, such as Name, are green. Click on a label cell and a data validation input message appears, with instructions for that field.

Show Messages - TRUE
Show Messages – TRUE

Choose FALSE for No Messages

Select FALSE and the label cells turn white, and no data validation input message appears when you click on a label cell.

Choose FALSE for No Messages

How Show/Hide Messages Works

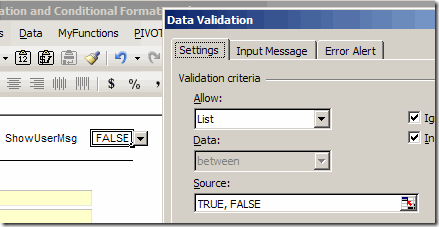
The TRUE/FALSE drop down list is in a cell named ShowUserMsg, and the list is created with data validation.

APJShowMsg03

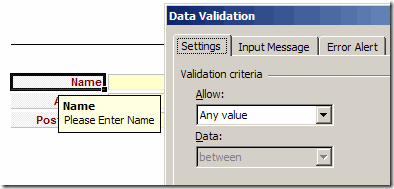
The labels cells also have data validation, which is set to allow Any value.

APJShowMsg05

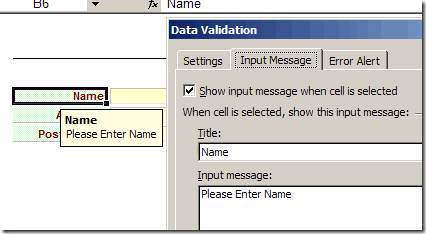
For each label, an Input Message is entered in the Data Validation dialog box.

APJShowMsg06

Colour Cells with Conditional Formatting

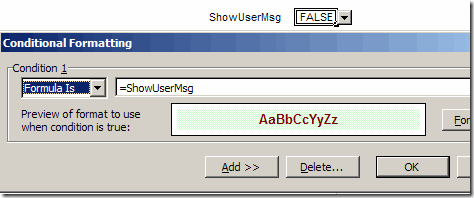
The label cells and ShowUserMsg cell are coloured with Conditional Formatting.

Excel Conditional Formatting Rules

Excel VBA Code -Show or Hide the Messages

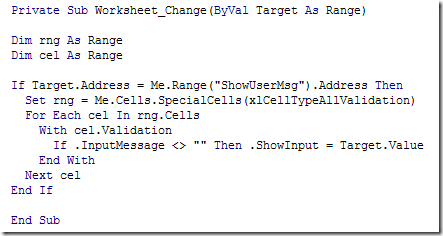
When you select an option from the TRUE/FALSE list, a Worksheet_Change event runs, and turns the messages on or off.

To see the code in Alex’s sample file, right-click the Show User Messages sheet tab, and click on View Code.

APJShowMsg07

Download the Sample File

You can download the Show or Hide Messages file from AlexJ’s Sample Spreadsheets page on the Contextures website.

In the Data Validation section, look for DV0001 – Show or Hide User Tips
___________________

Custom Colour Tips For Excel

Do you use many colours in Excel?

I keep most of my Excel workbooks relatively colour free, except for a few headings or charts, or to mark cells for data entry. Usually, I use Excel’s standard colours, but sometimes I need something a little different.

For example, if I’m building a workbook for a client, I might want to match their corporate colours.

Modify a Colour in Excel 2003

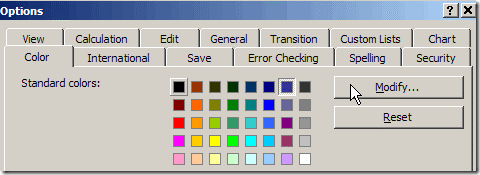
The colour options are hard to find in Excel 2003. To use a new custom colour to your workbook, you’ll have to modify one of the existing colours.

  1. On the Tools menu, click Options.
  2. On the Color tab, click on one of the standard colours that you don’t plan to use in this workbook
  3. Click Modify, to open the Colors dialog box

ColorMod2003

Select a Colour in Excel 2007

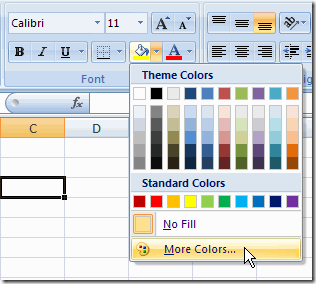
In Excel 2007, you can use a Ribbon command to open the Color dialog box.

  1. On the Ribbon’s Home tab, click the arrow at the right of the Fill Color or Font Color button
  2. Click More Colors…

FillMoreColors

The Color Dialog Box

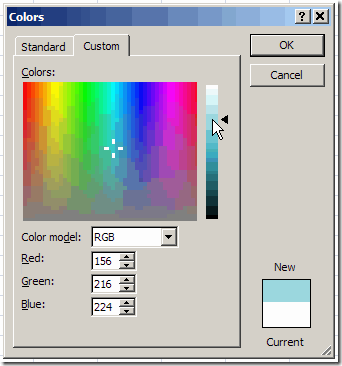
In both versions of Excel, the Colors dialog box looks the same.

ColorsCustom

Click on a colour in the Standard tab, or click the Custom tab for more choices.

Make It Bigger

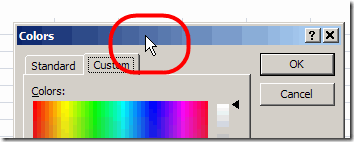
To make it easier to see the colours, double-click the Colors title bar, and the dialog box will expand to fill the screen.

That lets you really zoom in on the colour choices, at the pixel level, and find what you need.

double-click the Colors title bar
Double-click the Colors title bar

Select a Custom Colour

If my client provided colour information, I can enter the Red, Green and Blue numbers on the Custom tab, for an exact match.

When I don’t need an exact match, I can move through the custom colour screen until I find something that looks appropriate for the workbook.

To move through the Custom Colors palette:

  • Click on a colour with the mouse pointer
  • Or, on the keyboard, use the arrow keys to move up, down, left or right

At the bottom left of the Colors window, the Red, Green and Blue numbers will change, as you move through the colours.

_____________________
Re-open a Firefox Tab That You Accidentally Closed

Do you ever accidentally close a tab in Firefox, then want to get back to a website that you were exploring in that tab?

It happens to me a couple of times every day – I click on a link, and when I’m finished reading that page, I close the tab. Oops! That link hadn’t opened in a new tab, and now I’ve lost the original page that I was reading.

Re-open a Closed Tab From the History Menu

Fortunately, Firefox remembers what you’ve had open, and stores those tabs in its History.

To re-open a closed tab:

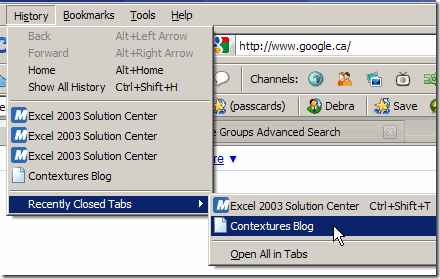
  1. Click the History Menu
  2. Click Recently Closed Tabs, to see a list of web page names.
  3. Click the name of the web page that you want to re-open.

FirefoxRecentClose

Re-open the Last Closed Tab From the Shortcut Menu

You can also re-open the last closed tab by using a shortcut menu:

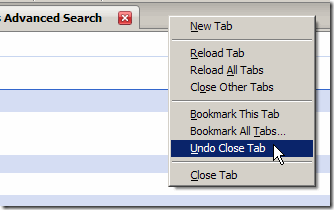
  1. Double-click in an empty area of the tab strip, for example, to the right of the last tab.
  2. In the shortcut menu that appears, click Undo Close Tab.

FirefoxUndoClose

__________________________________