It’s been a long week, so here’s a quick Excel data entry tip for you. You’ll see how to move through a set of data entry cells that are in different rows and columns, quickly and easily.
Move Through Data Entry Cells
In some worksheets, there are several cells that you need to fill in, but those cells aren’t lined up in a tidy row or column. Instead, those cells are spread out on the worksheet, so it takes a bit of tabbing or clicking, to get from one cell to the next.
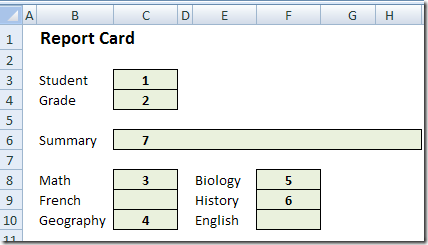
For example, here’s a student report card, where data is entered in the light green cells.
- Note: I’ve added numbers in the screen shot, to show the sequence in which the data is entered.

Select the Data Entry Cells
To make data entry easier in the report card sheet, you can create a named range for the data entry cells.
Later, select that named range, and press the Tab key, to easily from one cell to the next, in the correct sequence.
- Or, if you want to move back to the previous cell, so you can change your entry, press Shift + Tab
The first step is to select the data entry cells, and follow the steps below to do things in the right order.
Second Cell is First
IMPORTANT: Be sure to read this sequence for selecting the cells, before you name them:
- First, select the 2nd cell in which you want to enter data.
- In this example, you’d select cell C4, where the student’s grade level will be entered.
- Next, hold the Ctrl key and select the next cell, then the next, until the remaining cells, 3 to 7, are selected.
- Finally, select the 1st cell in the sequence – cell C3 in this example.
Why do you select the 1st cell last? Because that makes it the active cell in the range, so you’ll automatically start in that cell later.
Create a Data Entry Named Range
Next, with the data entry cells selected, follow these steps to name the data entry range:
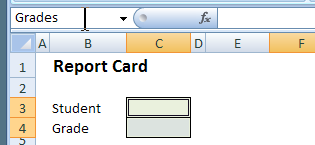
- Click in the Name Box, at the left of the Formula bar
- Type a one-word name for the cells – I used the name “Grades” in this example.
- Finally, to complete the name, press the Enter key – If you forget this step, the name is not created.

Use the Data Entry Range
After you create the named range for data entry, follow these steps when you want to enter a student’s report card data:
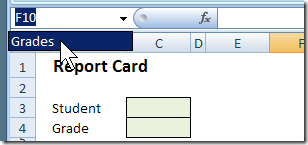
- Click the arrow in the Name Box
- Select the name, Grades, from the drop down list

- Type the student name in the active cell
- Press Tab or Enter to go to the next cell
- Repeat those steps, to fill in all the data
- When you’re finished entering data, click on any cell outside the named range.
Tip: To move back to the previous cell, press Shift + Tab or press Shift + Enter
Video: Jump to the Next Data Entry Cell
To see the technique to jump to the next data entry cell in Excel, watch this short video.
More Excel Data Entry Tips
For more data entry tips and videos, go to the Excel Data Entry Tips page on my Contextures website.
_______________
Excel Data Entry Tips Jump to Next Cell or Previous Cell
_______________


