 Yes, if your last name is Dalgleish, some people think it sounds like “Dog Leash”, and hilarity ensues. And no, I never get tired of that joke, thanks for asking. 😉
Anyway, unlike the proverbial old dog, those of us who have been using Excel for a long can CAN learn new tricks. Keep reading to discover which new Excel feature I recently discovered.
Long Time Excel Users
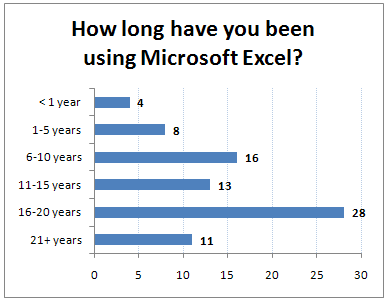
Maybe you’re a long time Excel user too. Last month I polled readers on my Debra D’s Blog, and asked How Long Have You Been Using Excel?
Almost half of the 80 respondents have used Excel for 16 years or more, and they shared some interesting stories in the comments.
Old Excel Habits
You learn a lot about Excel over the years, and appreciate both its strengths and limitations. You find workarounds for some of the features that don’t work the way you’d like, and accept that some things can’t be done in Excel.
Maybe you’ve even learned to love (tolerate?) the Excel Ribbon, despite all the years that you spent learning where the Menu commands were.
But occasionally, new features are added, without much hoopla, and you don’t even notice them. At least, that’s what happened to me!
Old Excel Header Tricks
Excel has customizable headers and footers, where you can place items like the date, or file name, in one of three sections — left, centre or right.
On the Excel Ribbon, click the Insert tab, and click the Header & Footer command, to change to Page Layout view, with the Header activated.
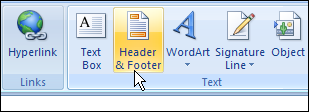
See Header and Footer Tools
While the Header or Footer are activated, there’s a Design tab on the Ribbon, with Header and Footer tools.
You can click on an Element, like Page Number, to add it to a section in the Header or footer.

Or, select one of the default options from the Header or Footer drop down lists.
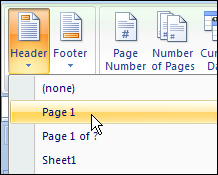
The Page Layout wasn’t available in previous versions of Excel, but the Header and Footer Elements are pretty much the same as they’ve always been.
New Excel Header Tricks
After working with Excel 2007 for almost three years, I finally noticed that the Excel Header and Footer have some fancy new Options. (How embarrassing!)
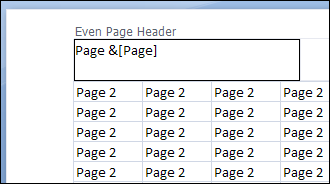
Now you can have a different header/footer on the first printed page, and different header/footer on the odd and even printed pages.
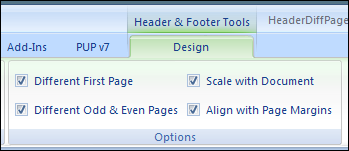
So, you could show a title on the first page only, then have page numbers at the left on even pages, and on the right on odd pages.

Microsoft Word has always had these options, but Excel didn’t. We just accepted that “Excel isn’t a word processing program” and did without the header options.
Align Header and Footer
You can also align the Excel Header and Footer with the page margins, which is another nice feature. In the old days, the Header and Footer margins couldn’t be changed, so they sometimes looked a bit out of line with the rest of the printed page.
Here’s the Page Layout view, with the Align With Page Margins feature turned on.
I hope you found these new Excel Header and Footer options long before I did, and remember to use them in your printed worksheets.
__________

I must admit that despite knowing about the fancy new page layout view and some of the header options, I rarely use them.
The scale with document feature is nice if you have several sheets which are set to auto-fit the page (by width or height or both) – turning OFF scale with document means that at least your headers are consistent between pages of your printed report, rather than being larger and smaller along with the content.
I also like to just use normal Home ribbon formatting tools or shortcut keys (especially Ctrl-B / I) for the parts of the header and footer instead of having to go into the header/footer dialogue, select the text, open the font formatting dialogue, change it, go take a look at the result, repeat ad nauseam. Now I click an element and just make the changes I want, click away to see the result (if using “fields” that I want to see converted to their values).