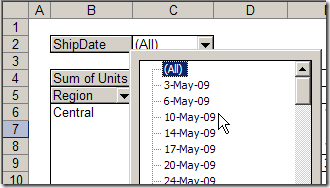
In a pivot table, you might want to see all the orders that were shipped on a specific date.
To do that, you’d move the Ship Date field to the Page area, and select a date from the drop down list.
Filter for Date Range
Sometimes though, you’d like to show the orders shipped in a date range, instead of just a single date. For example, you might like to show orders with ship dates in the upcoming week, so you can do some planning.
To accomplish this, you could manually hide all the dates in the Ship Date page field, except the dates for next week. However, that might take quite a while if there are lots of dates.
Another option is to add a new field to the source data, to test the ship dates, then add it to the pivot table, as a filter. This might slow things down a bit, if your source data table is very large.
We’ll look at both options in Excel 2003 — the steps are slightly different in Excel 2007.
Manually Hide the Dates
In Excel 2003, there are no check boxes beside the items in a Page field’s drop down list, to allow you to select multiple items.
To hide some of the items in a pivot table’s Page field, temporarily move the field to the Row area, and select the items there, then drag the date field back to the Page area.
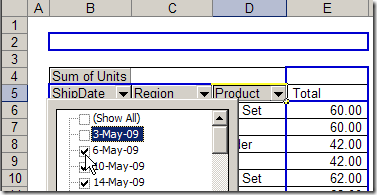
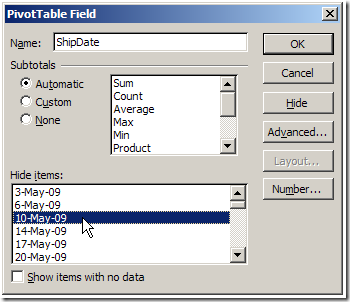
Or, without moving the field in the Page area, you can change the field’s settings.
- Double-click on the Ship Date field button.
- In the PivotTable Field dialog box, click on dates in the Hide Items list.
- Click OK to close the dialog box.
Add a New Field to the Source Data
Manually hiding the dates might work well if you only need to do this occasionally, and the list of dates isn’t too long. Otherwise, the best solution might be to add a column to the pivot table’s source data.
In this case, we’ll add a column named ShipSoon, and use a formula to test if the ship date is within the next 10 days.
- In the source data table, add a column with the heading ShipSoon. In this example, the new column is to the right of column A.
- In the first data row of the new column, enter a formula that checks the ShipDate in that row. Our first ship date is in cell A2, and the formula will test the date, to see if it’s within 10 days of today’s date.
=AND(A2>TODAY(),A2<=TODAY()+10)
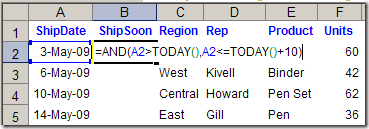
- Copy the formula down to the last row of data.
Each row will show TRUE or FALSE as the result of the formula.
Update the Pivot Table
Next, you’ll update the pivot table, and add the new field.
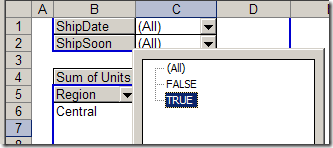
- Refresh the pivot table, and add the ShipSoon field to the Page area.
- From the ShipSoon Page field dropdown list, select TRUE.
Refresh the Pivot Table
Remember to refresh the pivot table each day to see the current calculations for the ShipSoon field.
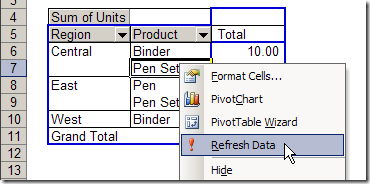
- To manually refresh the pivot table, right-click on a cell in the pivot table, then click on Refresh Data.
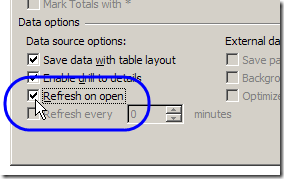
Or, you can set the pivot table to automatically refresh when you open the Excel file.
- Right-click on a cell in the pivot table
- Click Table Options
- In the Data Options section, add a check mark to Refresh on Open
- Click OK to close the dialog box.
____________________
