On most of the worksheets that I build, there is a mixture of labels, data entry cells, and cells with formulas. Here’s how to clear cells and leave formulas, if you want to start a new entry.
Order Form Worksheet
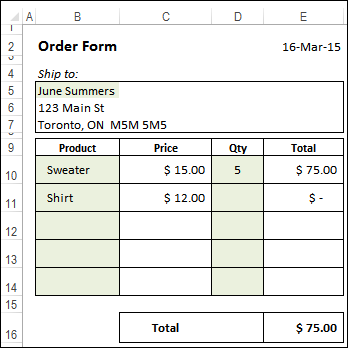
For example, here is the worksheet from my Excel order form tutorial. The shaded cells are where you enter data, and the white cells have formulas or labels.
Clear Out the Data
When it’s time to fill in a new order, what do you do? Ideally, you would have a blank template for this form, and open a new copy, each time that you wanted to create an order.
In real life, that doesn’t always happen, from what I’ve seen. People don’t have templates, or can’t find them, or don’t know how to use them. So, they just make a copy of an old order, and clear out the data, to make a new order.
If you want to clear out the old data, without deleting the formulas, how would you do it?
Select the Cells Without Formulas
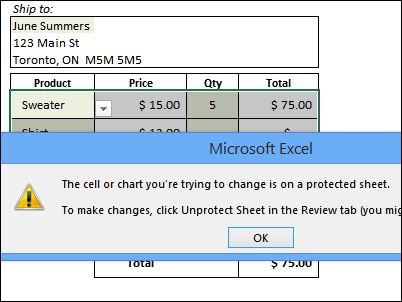
On this sheet, the formula cells are locked, and the sheet is protected. If you select the entire pricing section, and press Delete, Excel shows you a warning message, and doesn’t clear the cells.
Some of the selected cells are locked, so it can’t clear any of the cells.
To select only the data entry cells, you can use the built-in Constants selector.
- Select all the cells in the pricing section
- On the Home tab of the Ribbon, click Find & Select (at the far right)
- Click Constants, to select just the cells without formulas
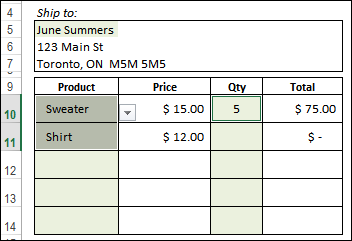
- Then, press the Delete key, to clear those cells.
Name the Data Entry Ranges
Another option is to create a named range that contains all the data entry cells. Later, you can select that range and clear it.
To name the range:
- Unprotect the worksheet
- Select the data entry cells
- Click in the Name Box (at the left of the formula bar)
- Type a one-word name for the range, e.g. DataEntryCells
- Press Enter, to complete the name
- Protect the worksheet
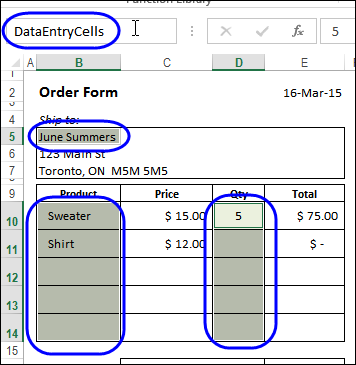
To clear the named range:
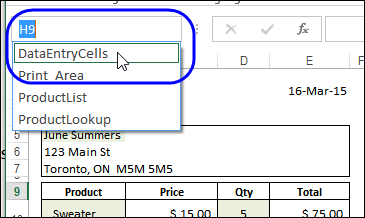
- In the Name Box, click the drop down arrow
- Select the range name – DataEntryCells – to select the cells
- On the keyboard, press the Delete key, to clear the cells
Record a Cleanup Macro
If you’re building a data entry sheet for someone else, you can add a “Clear” or “Reset” button to the worksheet. That might deter people from wandering around the worksheet, trying to clear things on their own!
To create the macro:
- Unprotect the worksheet, if it’s protected.
- Turn on the macro recorder, and name the macro
- Select the named range, and press the Delete key, to clear the cells.
- Select the first cell in the data entry range, so you’re ready to enter new data
- Turn off the macro recorder
To create the button:
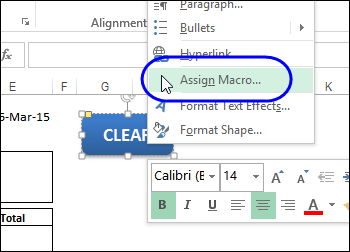
- Add a rounded rectangle to the worksheet, with the caption “Clear”
- Right-click on the rectangle, and click Assign Macro
- Select the macro that you recorded, and click OK
- Click on the worksheet, to unselect the button
- Protect the worksheet again, if you removed the protection
Save the File
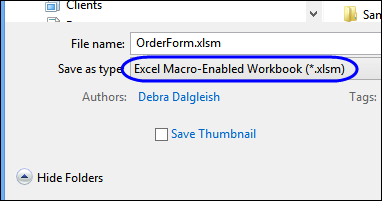
If you store a macro in your workbook, you’ll have to save it in Macro-enabled (xlsm) or binary (xlsb) format.
_____________________

I am dealing with the same issues as Jean-Paul, I cannot group dates as the command is grayed. Did anyone have a work around?. Working on excel 2013
Thanks Debra for the great tutorial!!!
Debra,
Thank you a ton for providing this tutorial.
It was enough to get me started creating my own customized order form. I learned a lot by experimenting with it.
Thank you. Just plain Thank You!
Randy
@randy, you’re welcome! Thanks for letting me know that it got you off to a good start.